Mapping Printers
Which printer am I allowed to use?
Printer Access by User Status
Depending on your status (Undergraduate Student, Graduate Student, Faculty, etc.), you will have access to specific printers. Use the following table to find out which printers you are permitted to use:
| Printer | Allowed Users | Location | Model | Color Capability |
|---|---|---|---|---|
| ps-lab | Undergrad & Grad Students | 1103G Dragas Hall | Brother HL-L5100DN | Mono |
| d-1100 | Faculty & Grad Students | 1100 Dragas Hall | Bizhub C258 | Multi-Color |
| d-1115 | Undergrad & Grad Students | 1115 Dragas Hall | Dell B3460DN | Mono |
| e-cubefarm | Faculty & Selected Researchers | 2nd Floor ECS Building | Brother HL-5150D | Mono |
| e-3300 | Faculty | 3300 ECS Building | Bizhub C258 | Multi-Color |
| e-gradlounge | Faculty & Grad Students | 3200 ECS Building | Bizhub C300i | Multi-Color |
Adding a printer
Adding a Printer on Windows
If a CS department printer does not show up automatically, you can add it manually via Windows Settings.
-
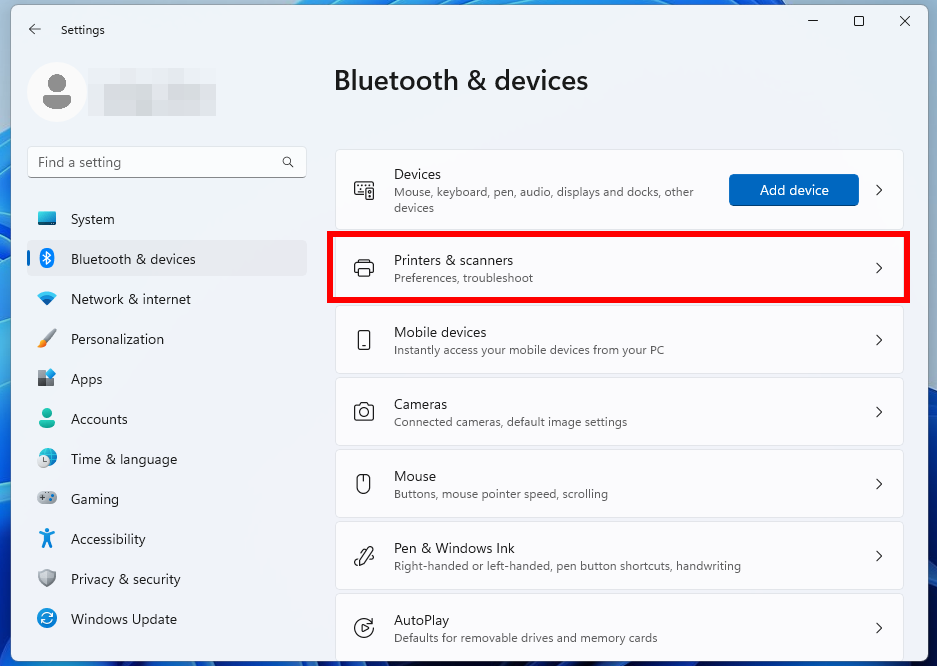
Open Settings and navigate to Bluetooth & devices then Printers & scanners.
-
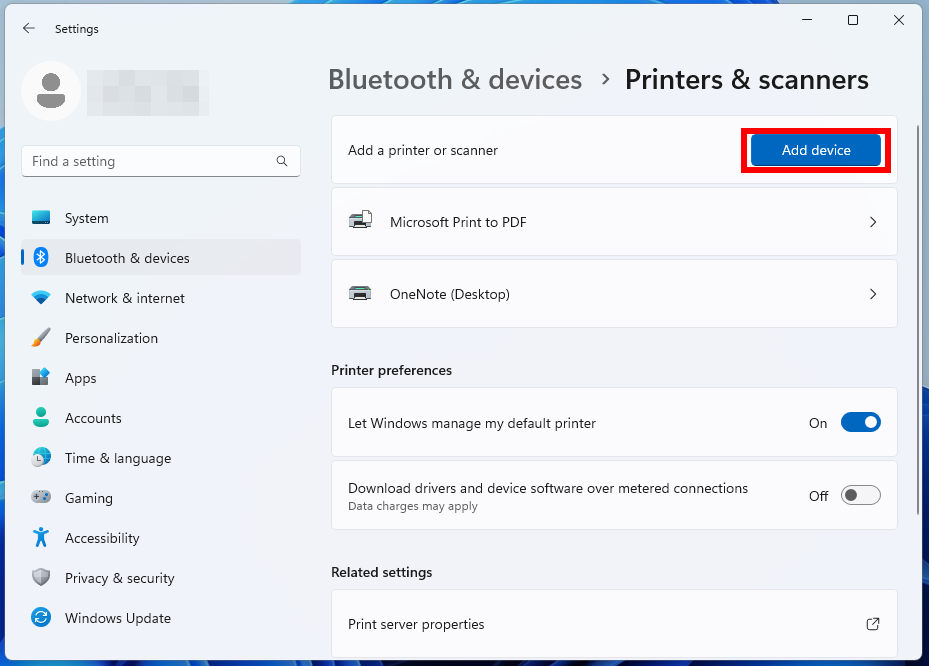
Click the "Add device" button next to "Add a printer or scanner".
-
Wait for the list of available printers to populate. Once the desired printer appears, select it and click "Add device".
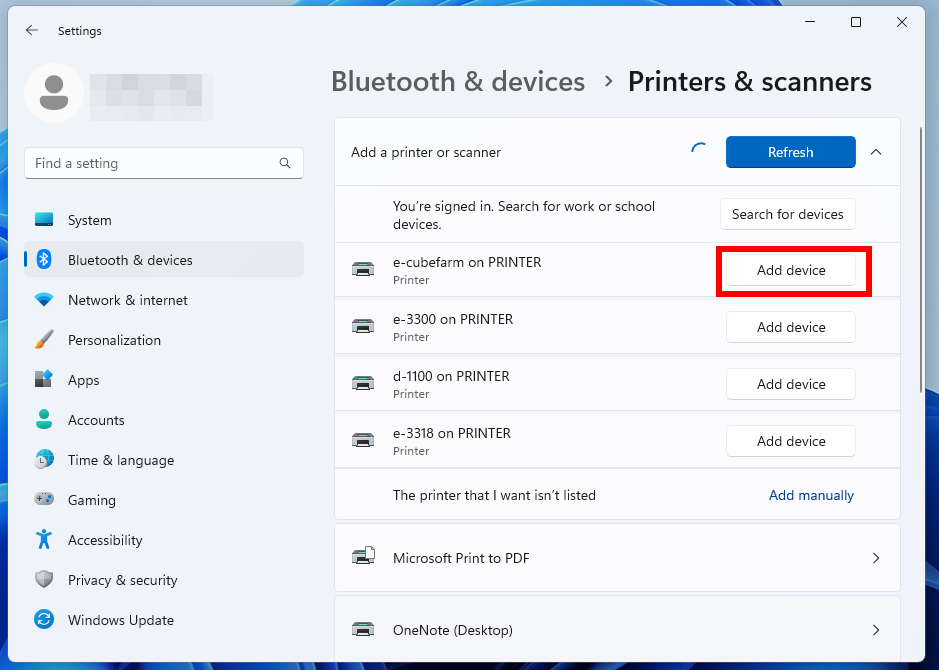
This should automatically add the printer to your computer and install the necessary drivers.
Troubleshooting: Printer Not Listed?
If you don't see any CS printers listed, or the specific printer you need is missing, please ensure you are connected to the ODU network (wired or ODU_Secure_Wireless). If issues persist, contact root@cs.odu.edu for assistance.
Adding a Printer on MacOS
On MacOS, you will typically need to manually add CS department printers.
VPN Connection Required for Off-Campus Users
If you are not physically on the ODU CS network (e.g., you are off-campus), you must be connected to the CS VPN before attempting to add or use CS printers.
-
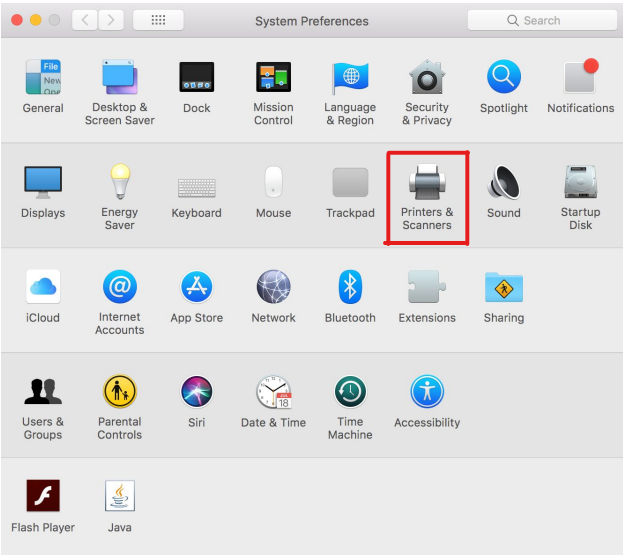
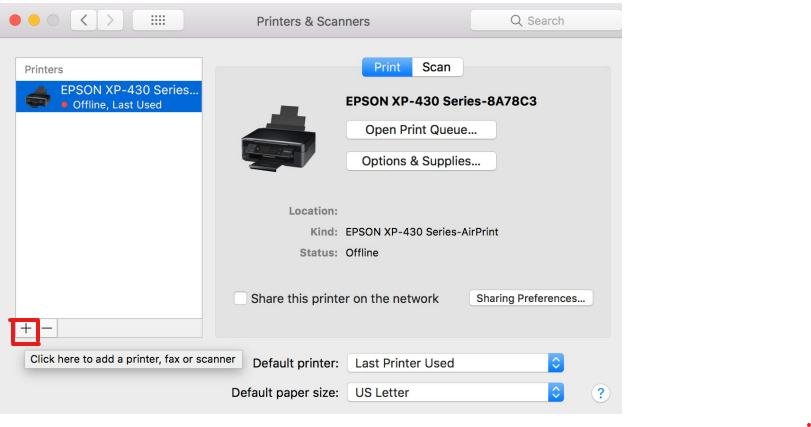
Go to System Settings (or System Preferences on older macOS versions) → Printers & Scanners.
-
Click the "+" icon below the list of printers to add a new printer.
-
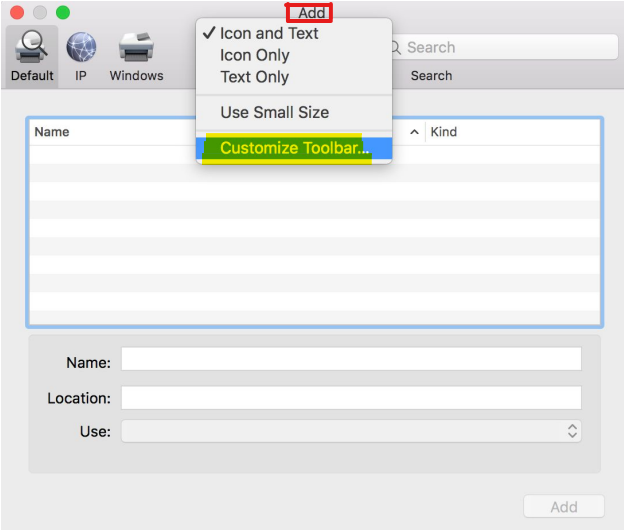
In the "Add Printer" window, hold the Control key and click anywhere on the toolbar (e.g., next to "Default", "IP", etc.). From the context menu that appears, select "Customize Toolbar...".
-
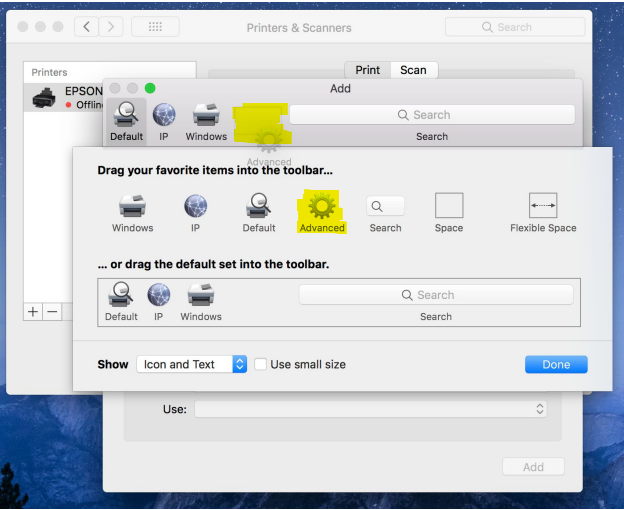
Drag the "Advanced" (gear) icon from the customization palette to an empty space on the toolbar in the "Add Printer" window.
-
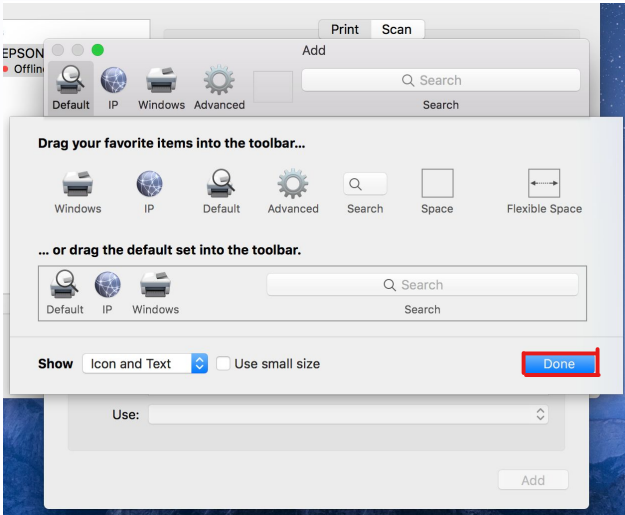
Click "Done" in the customization palette.
-
Now, click the newly added "Advanced" (gear) icon on the toolbar.

-
Fill in the data fields as follows:
- Type:
Windows printer via spoolss - Device:
Another Device(This field might not be present or editable in all macOS versions; focus on Type and URL). - URL:
smb://printer.cs.odu.edu/<printer_name> - Name:
<printer_name>(You can customize this to be more descriptive if you like) - Location: (Optional, e.g., "1103G Dragas Hall")
- Use: Select
Generic PCL Printer. If prompted to choose specific drivers, "Generic PCL" is usually a safe bet. If you know the specific model (from the table above), you can try to select a more specific driver if available.
Finding
<printer_name>Replace
<printer_name>with the corresponding printer name from the printer access table above (e.g.,ps-lab,d-1100).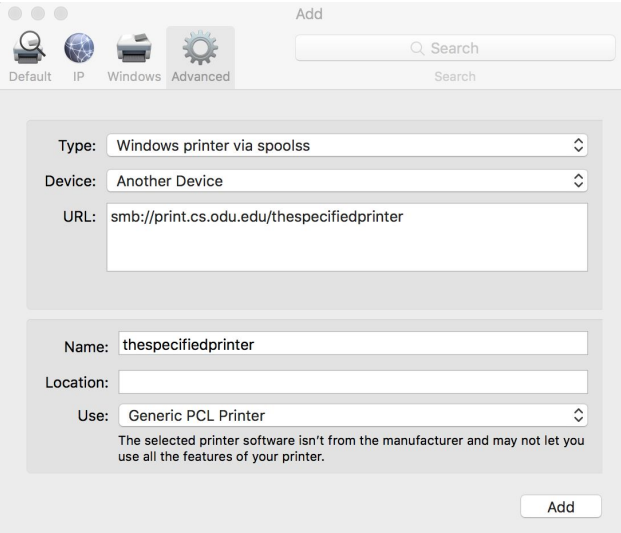
- Type:
-
Click "Add". You may be prompted about setting up the printer; confirm by clicking "OK". If prompted for credentials, use your CS Unix username and password.
Adding a Printer on Ubuntu (and similar Linux distributions)
- Open Settings and navigate to the Printers section.
- Click the "Add" or "+" button to add a new printer.
-
In the "Add Printer" dialog:
- Under "Network Printer" (or similar section), look for an option like "Windows Printer via SAMBA" or "SMB Printer".
-
In the field for the SMB printer address (often labeled "smb://"), enter the printer URL in the following format:
!!! tip "Findingsmb://printer.cs.odu.edu/<printer_name><printer_name>"Replace `<printer_name>` with the appropriate printer name from the [printer access table above](#which-printer-am-i-allowed-to-use) (e.g., `ps-lab`, `d-1100`). -
Click "Forward" or "Add".
-
If prompted for authentication:
- Select "Set authentication details now".
- Enter your CS Unix username (e.g.,
your_cs_username). - Enter your CS Unix password.
-
When prompted to choose a driver:
- Select "Generic" from the list of manufacturers (or "Select printer from database").
- Choose "Generic PCL Printer" (or a similar PCL variant) as the model.
-
Click "Forward", review the settings, and then click "Apply" or "Add" to complete the setup. You can print a test page to confirm.