Mapping Printers
Which printer am I allowed to use?
Depending on your status you will have access to a certain amount of printers, use the following table to find out which printers you are allowed to use
| Printer | Allowed Users | Location | Model | Color Capability |
|---|---|---|---|---|
| ps-lab | Undergrad & Grad Students | 1103G Dragas Hall | Brother HL-L5100DN | Mono |
| d-1100 | Faculty & Grad Students | 1100 Dragas Hall | Bizhub C258 | Multi-Color |
| d-1115 | Undergrad & Grad Students | 1115 Dragas Hall | Dell B3460DN | Mono |
| e-cubefarm | Faculty & Selected Researchers | 2nd Floor ECS Building | Brother HL-5150D | Mono |
| e-3300 | Faculty | 3300 ECS Building | Bizhub C258 | Multi-Color |
| e-gradlounge | Faculty & Grad Students | 3200 ECS Building | Bizhub C300i | Multi-Color |
Adding a printer
Windows
If a printer does not show automatically up, you can add it via settings.
- Open setting and go to Bluetooth & devices then printers & scanners.
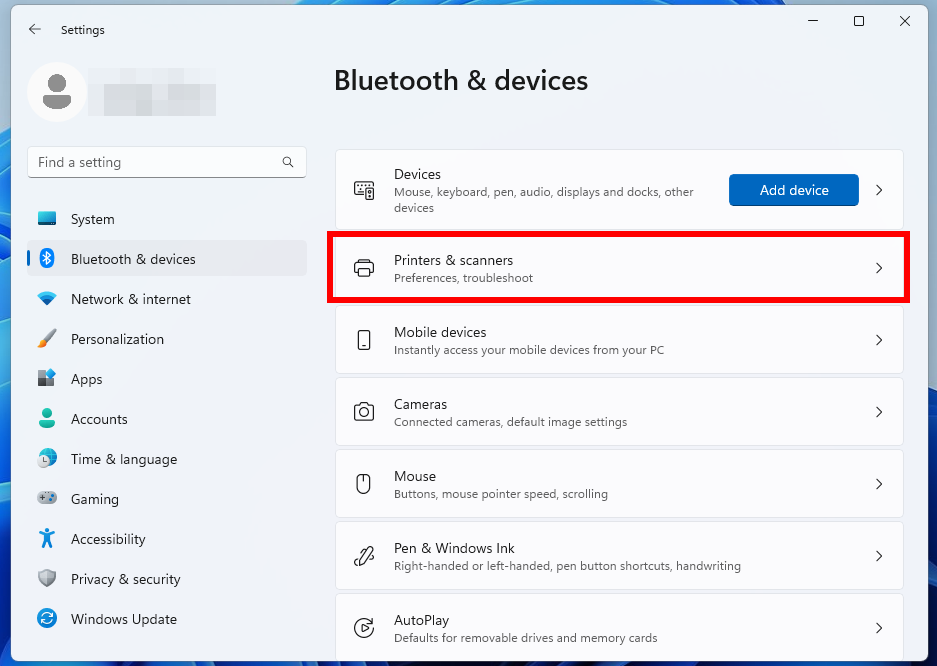
- Click "add device".
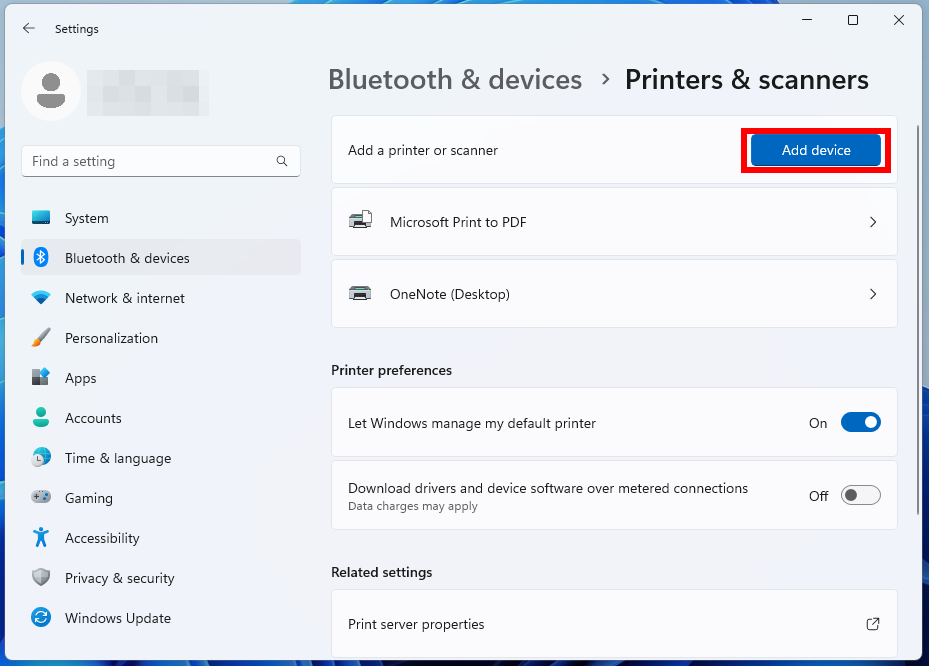
- wait for a printer to appear and click "add device".

This will automatically add the printer to your computer.
if you don't see any printers please reach out to root@cs.odu.edu  .
.
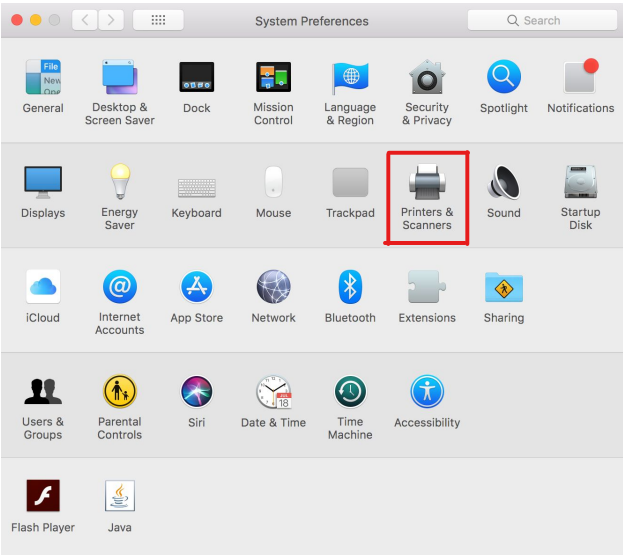
MacOS
On MacOS you will have to manually map a printer
if you are not on the CS network, you have to be connected to the CS VPN
-
Go to System Preferences -> Printers and Scanners
-
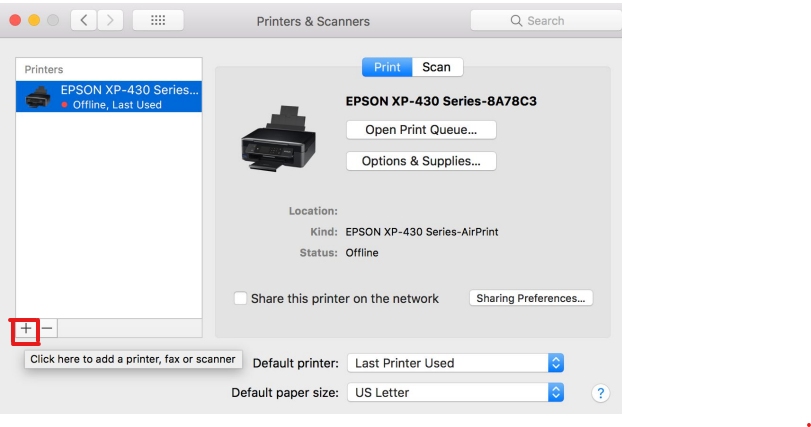
Click "+" icon
-
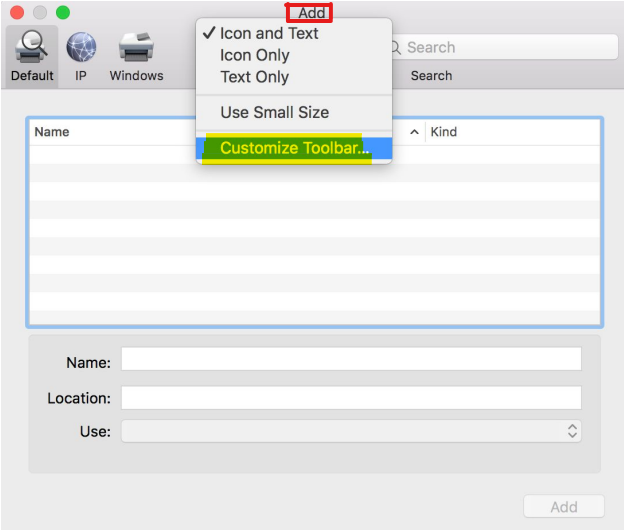
Hold the "control" button and click the "add" text at the top, then click "Customize Toolbar"
-
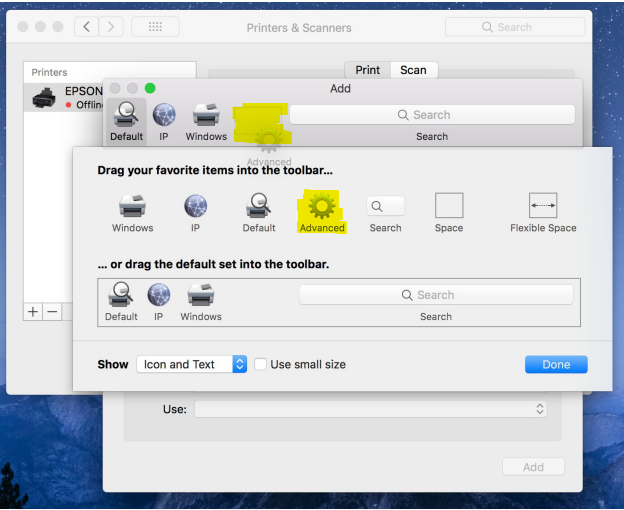
Drag the "Advanced" gear icon to the open space in the previous window
-
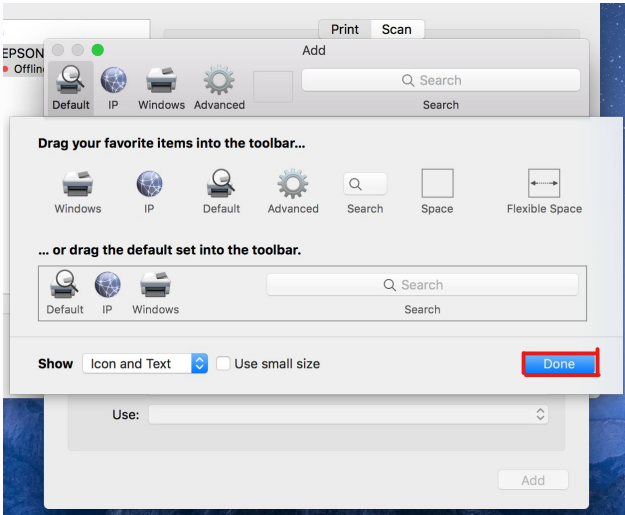
Click "done"
-
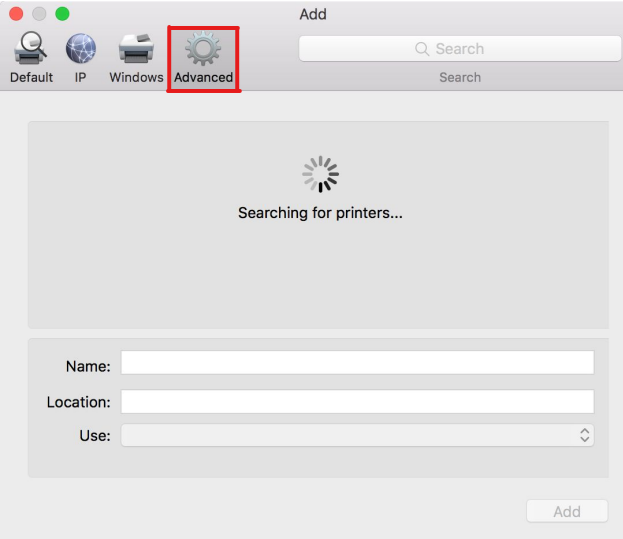
Click the "advanced" gear icon
-
Fill in the data fields with the following:
Type:Windows printer via spoolss
Device:Another Device
URL:smb://printer.cs.odu.edu/<printer>
Name:<printer>
Location: None
Use:Generic PCL Printer
replacing
<printer>with the corresponding printer name found here
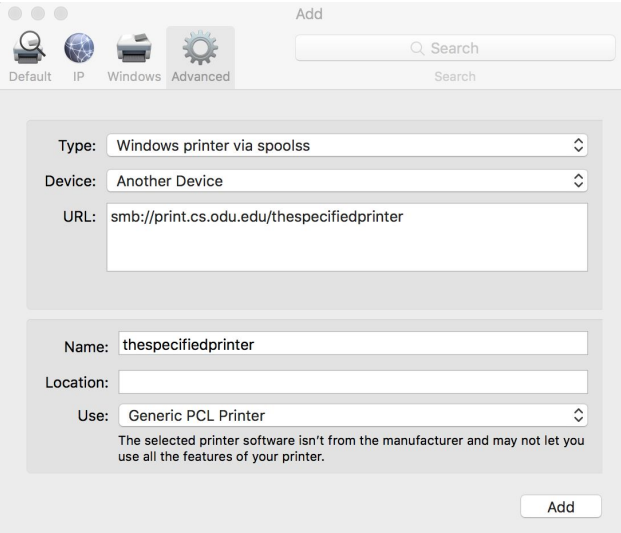
8.Click "add", wait for the setting up and click "ok"
Ubuntu
-
Open Settings → Printers.
-
Click Add Printer (the "+" icon).
-
In the list, select Network Printer and choose Windows Printer via SAMBA.
-
In the SMB field, enter the printer URL in the following format:
smb://printer.cs.odu.edu/<printer> Replace with the appropriate printer name from the Allowed Printers List. -
Click Forward. If prompted for a username and password, use your CS credentials.
-
Choose the driver: Select Generic → Generic PCL Printer. Click Forward and confirm the configuration. Click Apply to complete the setup.