Crestron Units
Classrooms in the Computer Science Department may be equipped with Crestron Control Units. These touch-screen units allow you to easily connect and switch between various input sources (such as the instructor desktop or a personal laptop) to display on the room's BenQ board or projector.
Displaying on BenQ Boards
Instructions for sharing your screen to classroom BenQ displays using either the built-in instructor desktop or a personal laptop.
-
Turn on the BenQ display.
Press the Power button located in the lower-right corner of the BenQ board.
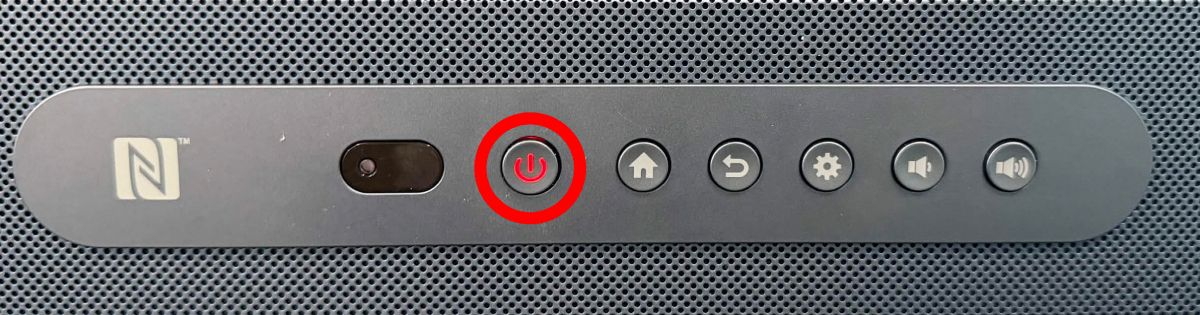
Power Button Status Indicators
- Solid Green: The display is powered on.
- Red or Blinking Red/Green: The display is in standby mode or turned off.
-
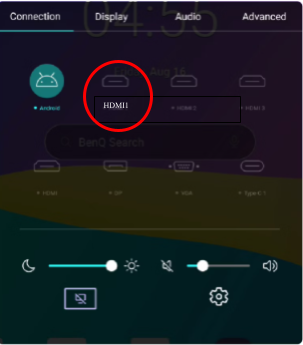
Select HDMI 1 as the input source on the BenQ board.
If the screen is not already displaying the correct source, open the input selection menu on the BenQ board and select HDMI 1.
-
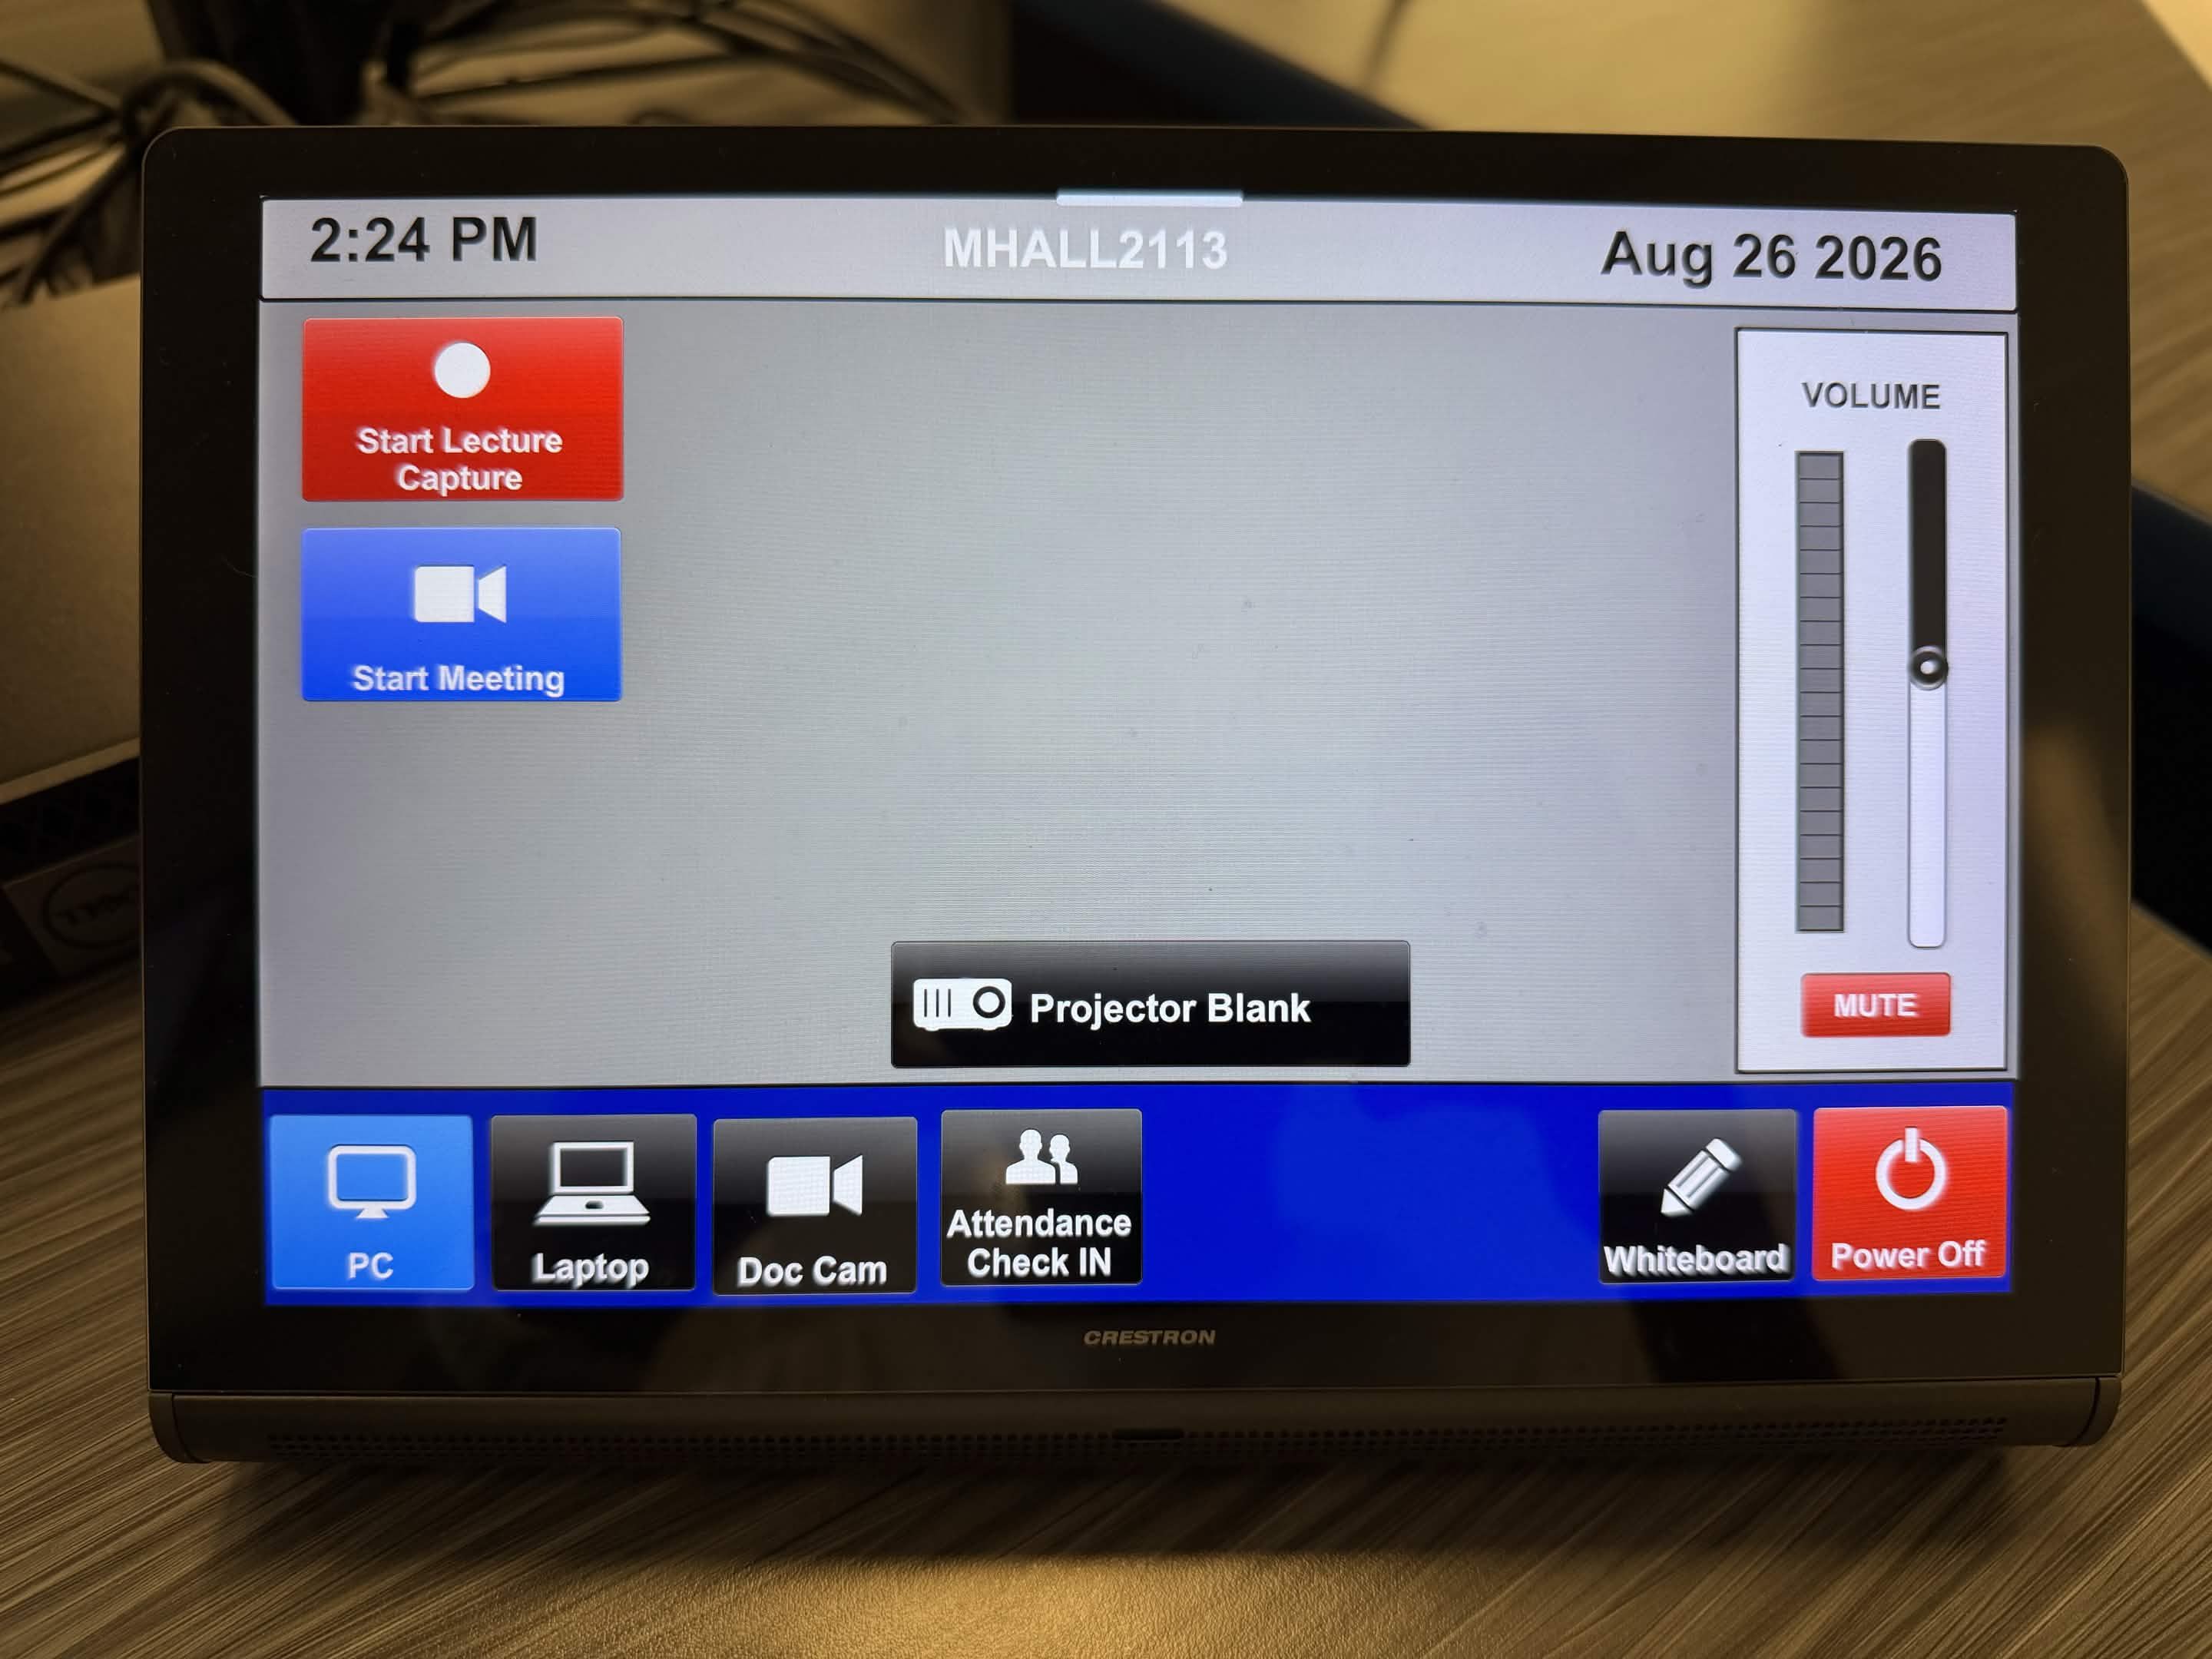
Select your input device on the Crestron touch panel.
Locate the Crestron touch screen unit (typically on the instructor podium) and tap the button corresponding to your desired input source:
- Instructor PC / Desktop: Select this option to project the built-in classroom desktop.
- Laptop HDMI: Select this option if you have connected your personal laptop via the HDMI cable.
Black or Blank Screen on Instructor PC?
If you select the Desktop input and the desktop screen appears completely black on the BenQ board, ensure the instructor desktop is turned on and that you have logged in. The display may turn off or sleep when at the Windows login screen.
-
Configure your display projection mode.
Ensure your computer is configured to project correctly. On Windows, you can press Win + P to open the Project menu.
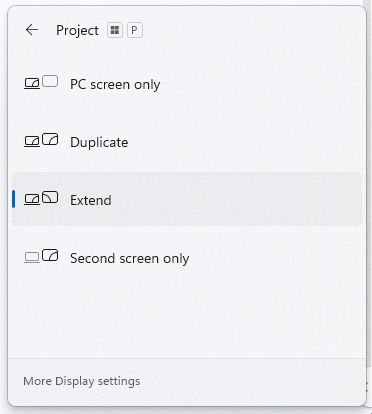
Typically, you will want to select one of the following modes:
- Duplicate: Mirrors your primary screen exactly onto the classroom display.
- Extend: Treats the classroom display as a second monitor, allowing you to drag windows over to it.